Guides / Running a Group Buy
Inspecting a Keyboard Case: Flatness, Rock and Cosmetic Checks
October 17, 2026
The parts arrive and the pressure is on. Hundreds of cases are in boxes, buyers are waiting and everyone wants to start shipping. This is the moment when an inspection plan is worth more than at any other point in the project, because anything you find now is still the shop’s problem and anything you find after shipping is yours.
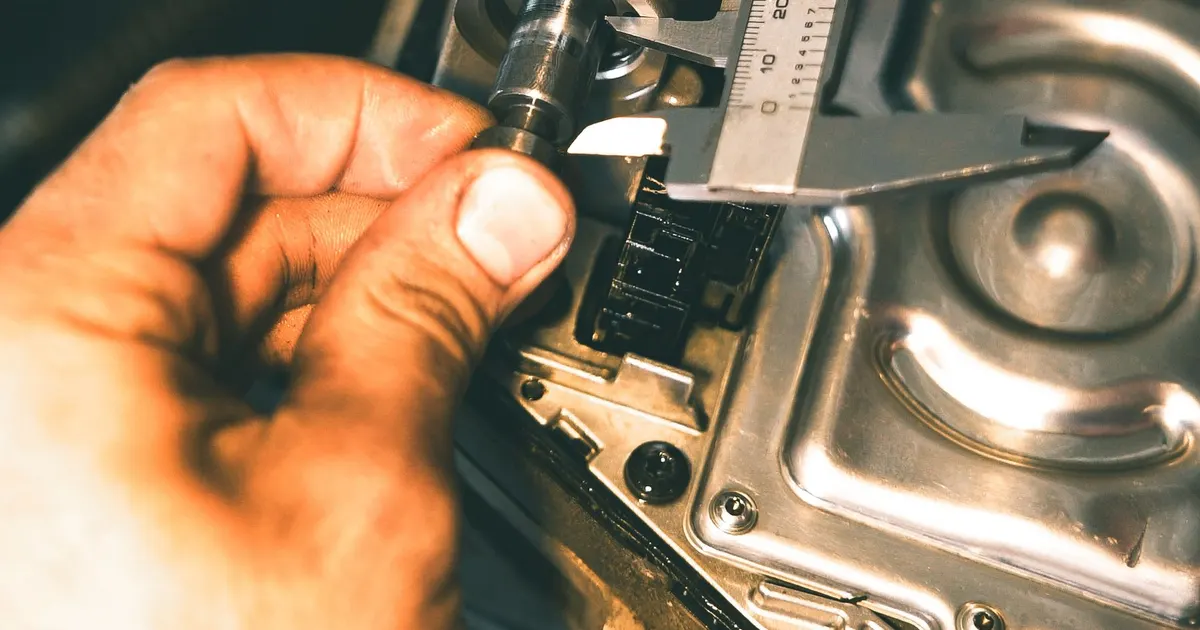
You do not need a metrology lab. A flat surface, a pair of calipers, a set of feeler gauges, a few test parts and a good light cover most of what matters on a keyboard case. This guide sets out the checks, the typical limits and what to write down.
Decide before the parts arrive
An inspection only works if it measures something agreed in advance. If the acceptance limits are first written when the parts arrive, the argument is about the limits, not the parts.
Before the run ships, settle three things with the shop in writing:
- What will be inspected. Which dimensions, which cosmetic zones and how.
- What counts as a fail. The numbers and the defect limits, referring to your drawing and your cosmetic standard.
- What happens after a fail. Replacement, credit or rework, plus the window in days for raising it.
The shop’s own final inspection report is a useful addition. It does not replace yours, but it shows what they measured and gives you something to compare against.
The checks and their typical limits
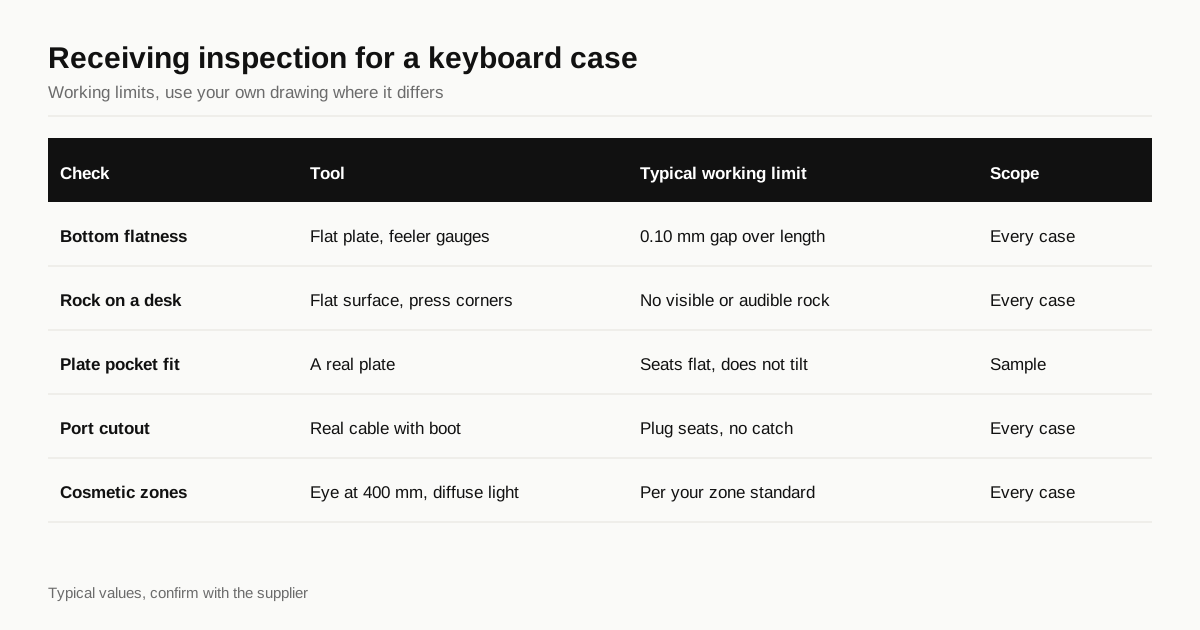
These are the checks that catch most problems on a machined case. The limits are working starting points, not rules, and your drawing takes priority.
| Check | Tool | Typical working limit | When to do it |
|---|---|---|---|
| Bottom flatness | Flat reference plate and feeler gauges | 0.10 mm gap across the length | Every case |
| Rock on a desk | Flat surface, press each corner | No visible or audible rock | Every case |
| Plate pocket fit | A sample plate | Plate drops in, sits flat, does not tilt | Sample |
| Gasket shelf depth | Depth gauge or caliper | Within the drawing tolerance | Sample |
| Screw hole fit | Test screws of the real size | Thread starts by hand and seats | Sample |
| Port cutout | A real cable with its boot | Plug fully seats, no catch | Every case |
| Cosmetic zones | Eye at 400 mm, diffuse light | Per your zone standard | Every case |
| Weight | Kitchen or lab scale | Within a band of the sample | Sample |
The “every case” checks are the ones that are quick and that a buyer would notice. The “sample” checks take longer and tell you about the process.
Flatness and rock
Flatness and rock sound alike and are not the same. Flatness is a measurement of how far the bottom surface departs from a plane. Rock is what a person feels when the case is on a desk and moves under finger pressure.
To check flatness, place the case on a known flat surface. A granite surface plate is the proper tool, and a piece of thick glass that you trust is a common substitute. Slide a feeler gauge under each corner and along the edges. The largest gap that a gauge can enter is a measure of how far the surface departs from flat, and 0.10 mm over the full length is a common working limit.
To check rock, press down on each corner in turn and listen and feel for movement. A case that is flat on a plate can still rock if it has support feet or a ridge. The feet may sit on a bumper or weight that is not in your measurement, so test the case as it will be used.
Failures usually come from stress in the material being released as pockets are cut. Thick plate that has been properly stress relieved is less prone to it. See aluminium plate stock sizing for why plate choice matters.
Fit checks that need a real part
Some failures only show up when the case meets the parts it holds. Flatness and calipers will not find them.
- Plate fit. Drop a real plate into the pocket. It should seat without force and without tilting. Check it again after anodising, because the coating adds thickness.
- PCB and standoff alignment. Place a real board on the bosses. Screw holes should line up and the board should sit without bowing.
- USB cutout. Use a thick cable with a moulded boot, not just the bare plug. A cutout that fits a bare plug can still block a real cable.
- Gasket compression. If the design uses gaskets, build one and test it. This is the most important check on a gasket mount. See the gasket mount design guide.
- Full build. Assemble one complete keyboard from the lot. Rattles, uneven gaps and tight screws appear here first.
These checks take an hour for a sample and are the best protection against a systematic fault in the whole run.
Cosmetic inspection
Cosmetic inspection is the part buyers argue about, and the best protection is a standard that is measured, not described.
A workable default is to inspect at 400 mm under diffuse office lighting for ten seconds per surface. Look at the primary zone first, then the secondary zone. Ignore the hidden zone unless your standard says otherwise. A good colour match check puts the golden sample next to the case, in daylight and under warm indoor light.
Look for the usual defects:
- Scratches and witness marks. Check the stated length limit in the primary zone.
- Blast inconsistency. Patches or bands in a flat face, best seen by tilting the case under the light.
- Colour variation. Compare against the golden sample and against other cases in the same box.
- Racking marks. Confirm they sit where you agreed.
- Edge damage. Chips and dents on corners.
Record the defect, take a photograph and mark which case it came from. A box number and a position written on masking tape is enough.
Sampling
Checking every case for everything is slow and, for a run of several hundred, usually unnecessary. A common approach combines two levels:
- Every case for the cosmetic look and the rock check, since these are quick.
- A sample for dimensions and fit. Many buyers use roughly ten percent of the run or at least five cases, drawn from different boxes.
If a sample finds a fault, widen the check to the rest of the batch. A formal sampling plan such as ANSI/ASQ Z1.4, which follows ISO 2859-1, is available for those who want one, and it gives a defensible number for how many to check and how many failures to accept.
What to record
Write results down so a conversation with the shop is about evidence.
- Lot or batch and box number. So a failure can be traced to a day and a tank.
- Measurements. The numbers, not just “pass”.
- Photographs. Of every failure, with a scale reference.
- Date of receipt and date of inspection. The window in your agreement runs from one of these.
A simple spreadsheet and a folder of photographs is enough. If you ever need to raise a claim, a clear record turns an argument into a correction.
A short inspection routine
Once the limits are agreed, the routine for one case takes a few minutes and is the same every time. A pattern that works well for a run of a few hundred:
- Open the box and check the packing. Look for movement, loose parts and any damage to the wrapping before you touch the case.
- Cosmetic first. Inspect the primary zone under your agreed light and set aside anything that looks doubtful.
- Flat and rock. Put each case on the reference and press the corners. A case that rocks goes in its own pile for measurement.
- Sample fits. Pull the sample cases from different boxes and run the plate, board, cable and screw checks.
- Write it down. Record the box, the case, the result and a photograph of any fault.
Keep the routine fixed from the first case to the last. Inspectors drift when tired, and a short printed checklist next to the light keeps the fiftieth case measured the same way as the first.
Raising a failure
Be specific and quick. Send the shop the case number, the photograph, the measurement or defect type and the clause in the agreement or drawing that it fails. State what you want: replacement, credit or a call. A shop that sees a clear record usually responds in the same spirit, and most of the awkward conversations in this business come from vague complaints made late. The group buy customer guide explains how shops see this from their side.
Before the run ships
- Acceptance limits and defect limits agreed in writing
- Replacement or credit terms and the claim window agreed
- Flat reference, feeler gauges, calipers, test screws and real cable ready
- Golden sample available for comparison
- Record sheet and camera ready
If you are planning a run and want it matched with shops that publish their own inspection reports, send the files through the RFQ form.
Frequently asked questions
How flat should the bottom of a keyboard case be?
A working limit of 0.10 mm across the full length is a common starting point for a machined aluminium case, and it is usually enough to stop any rock on a desk. Check the number against your drawing, since a tighter or looser figure can be set where the design needs it.
How many cases should I inspect from a run?
For a run of a few hundred, many buyers check every case for cosmetic defects and a sample of about ten percent, or at least five, for dimensions and fit. A recognised sampling standard such as ANSI/ASQ Z1.4 gives a more formal plan if you want one.
What do I do if a case fails inspection?
Photograph it, record the lot and failure mode and raise it with the shop within the window your agreement allows. An anodised cosmetic failure cannot be reworked, so the usual remedy is a replacement from the overage or a credit.
Need a quote for your case?
Send the files. We match you with up to 3 shops that machine keyboard cases and reply within 24 business hours.
Get matched with a keyboard case shop