Guides / Finishing
Laser Engraving Keyboard Case Badges, Backs and Weights
October 18, 2026
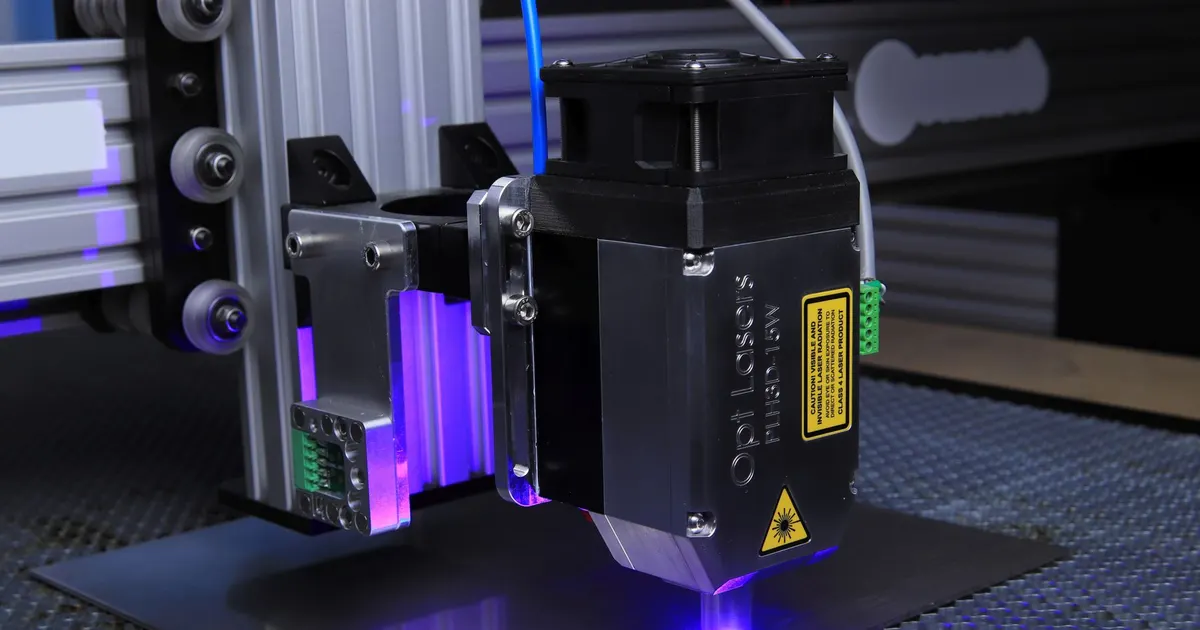
A plain machined case is anonymous. Most designers want a badge on the front, a serial number and a few lines of text on the back, and sometimes a logo on a brass or steel weight. Laser engraving is how most of it is done, because it is fast, fine and needs no tooling beyond a fixture and a file.
It also introduces a new place for a cosmetic problem to appear. This guide covers what the laser does on the common surfaces, where in the process it belongs and what to send so the shop does not have to guess.
What a fibre laser does to metal
A fibre laser is the common machine for marking metal. It focuses a very small spot of intense light and scans it across the part under software control. The effect depends on the surface.
- On anodised aluminium, the laser burns off the thin anodic layer and its dye inside the artwork. What is left is bare aluminium, which reads as a bright silver or white mark against the coloured case. This is the effect most keyboard badges use.
- On bare aluminium, the laser changes the surface by melting or oxidising it, and the contrast is low. The mark is grey and subtle, and it fades if the case is later anodised without allowing for it.
- On brass, the result depends on settings. Brass can be marked with a dark or a light mark, and it can be engraved deeply with repeat passes. A lacquered or plated brass surface loses its coating where the laser hits.
- On steel and titanium, a slow pass can create a dark or coloured mark by oxidation without removing material.
None of this needs to be memorised. What matters is that the same file can look quite different on different surfaces, and the shop should show a sample on the real material before the run.
Where it sits in the process
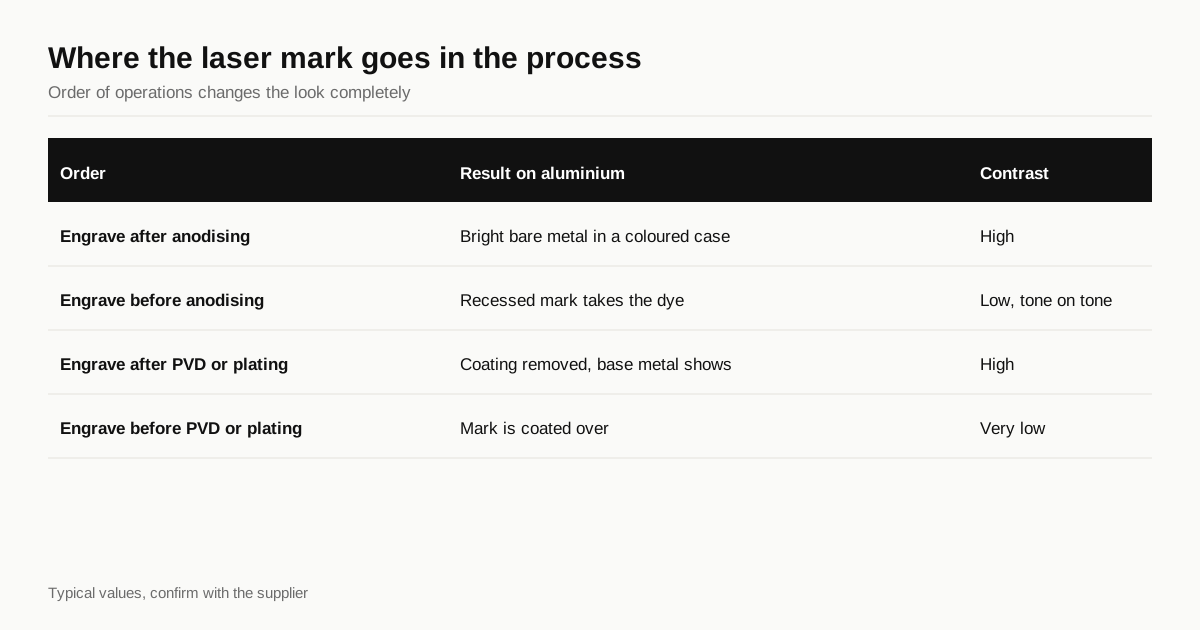
The order of operations changes the look completely.
| Order | Result on aluminium | Contrast | Typical use |
|---|---|---|---|
| Engrave after anodising | Bright bare metal inside a coloured case | High | Badges, logos, legends |
| Engrave before anodising | Recessed mark takes the dye | Low, tone on tone | A quiet signature |
| Engrave after a PVD or plated finish | Coating removed, base metal shows | High | Brass or steel weights |
| Engrave before a PVD or plated finish | Mark is coated over | Very low | Rarely wanted |
For a front badge in a contrasting colour, the usual choice is to engrave after anodising. That also means the mark sees the case last, so the engraver is the final cosmetic risk on a finished part. A shop that handles finished cases carefully, with gloves and soft fixtures, is worth more than one that is slightly cheaper.
Tone on tone marks are done before anodising and look subtle because the dye fills the recess. They suit a restrained design, and they survive wear better because there is no bare metal exposed to oxidise.
What to put on the back and what not to
A common set of marks on a case looks like this:
- Front or side badge. The logo, usually the largest and finest artwork, on a visible face.
- Back text. The name of the board, the batch number and a serial number, typically on the underside.
- Weight. A logo or a series name on a brass or steel weight, usually engraved deeper.
- Port or switch legends. Small icons or labels next to a port or switch.
The back is where designers often get ambitious, and it is where laser marking is most forgiving, because nobody inspects it at arm’s length. A serial number there is a good idea for any run above a few dozen. It helps with warranty questions and with sorting which cases came from which anodising lot. Keep it to a short code and put it in the same place on every case so inspection is quick.
Artwork the shop can run
The laser follows vectors, so the file format matters more than the resolution.
- Send vector artwork. SVG, DXF or an outlined PDF or AI file. A PNG gives the shop only edges to trace.
- Convert text to outlines. A font that is not installed will be substituted without warning.
- State the size. Give the final dimensions in millimetres and the position from a named edge.
- Check the line width. Fine lines below the laser’s practical limit disappear or merge. About 0.1 to 0.15 mm is typical, and text about 1 to 1.5 mm tall stays legible.
- Say which parts are filled. The laser can fill an area with a close pattern of lines or trace only an outline. A filled logo reads very differently from an outlined one.
Add a drawing note giving the position tolerance. Plus or minus 0.2 mm is a common working figure for laser placement on a fixture, and a tighter number will usually cost more. See writing drawing callouts for clear wording.
Depth, haze and heat
On a thin anodic layer the laser needs very little energy, which is why a good mark looks crisp. Three things can spoil it.
- Too much power leaves a tinted halo around the mark where heat has altered the surrounding anodise. It reads as a faint brown or grey edge.
- Too little power leaves a patchy mark where some of the dye remains, which reads as a weak, uneven badge.
- A curved or uneven surface shifts the focus. On a flat case face this is not a problem, but a chamfer or a curved bezel can need a different setting or a different fixture.
A sample on a real finished surface is the only way to see which of these applies. Ask the shop to mark one with your file and approve it before they run the batch. This is the same logic as approving a golden sample for colour, and it takes five minutes.
Engraving versus other ways of marking
A laser is not the only option and not always the right one.
- CNC engraving with a small cutter makes a true recess you can feel. It is slower, leaves a different look and suits deep, bold marks on brass or thick aluminium.
- Pad printing or screen printing puts ink on the surface. It gives colour, which a laser cannot, but the ink can wear and it adds another process and vendor.
- Etching is chemical and rare for a keyboard case.
A laser fits best for fine, permanent, bare metal marks. If your design needs a colour logo, print is more honest than trying to make a laser do it. The finishing trade-offs are covered in PVD and Cerakote on keyboard parts, where the same coat and mark question comes up for weights.
Marking brass and steel weights
Weights are small, heavy and often the most visible part of the back of a case. Three points matter.
- Mark before or after the coating? Marking after a PVD or plated coat gives high contrast because the laser removes the coat. Marking before gives almost none.
- Depth. A deep engrave on brass can be filled with paint or left bare. A shallow mark is quicker and cleaner but wears off sooner.
- Fixture. A small weight needs a jig to hold it flat under the laser. A shop that engraves a few hundred should have one.
If a weight is engraved by a different vendor from the one who machined it, it is another shipment and another date. Ask whether that is planned and who owns the schedule.
What it adds to the quote
Laser marking is usually priced per part and scales with the time the laser runs, which in turn depends on how much area is filled. A small outlined badge takes seconds. A large filled logo takes longer. There is also a small one-time charge for the fixture and for setting up the file.
Compare quotes by asking for the marking as its own line and for the assumed artwork area. If it is bundled into finishing with no detail, the number is probably an average that will not hold if your artwork is larger than the shop expects.
Before you send the artwork
- Vector file with text converted to outlines
- Final size and position stated from a named edge
- Line width above the shop’s minimum
- Order of operations stated: before or after anodising or coating
- Sample approved on the real finished surface
When the artwork is ready, send the case files and the artwork through the RFQ form and we will match them with shops that mark finished cases in house.
Frequently asked questions
Does laser engraving damage an anodised keyboard case?
It removes the anodic layer inside the marked area on purpose, which is what creates the contrast, and leaves the rest of the surface untouched. A well set up job does not mark outside the artwork, but a heat tinted halo around the mark is possible if power is too high, so approve a sample first.
How small can the text on a laser engraved badge be?
Fine lines of about 0.1 to 0.15 mm are typical for a fibre laser on a flat surface, and text about 1 to 1.5 mm tall usually stays legible. Shops differ, so ask for their minimum line width and keep serif details heavier than that.
Should the laser mark go on before or after anodising?
After, if you want bright bare metal inside the mark against a coloured surface. Before, if you want a tone on tone mark that takes the dye. Each looks different, so tell the shop which one you want and approve a sample.
Need a quote for your case?
Send the files. We match you with up to 3 shops that machine keyboard cases and reply within 24 business hours.
Get matched with a keyboard case shop