Guides / Design and Fit
CNC Machined Keycaps in Aluminium and Brass: Notes for Small Runs
October 13, 2026
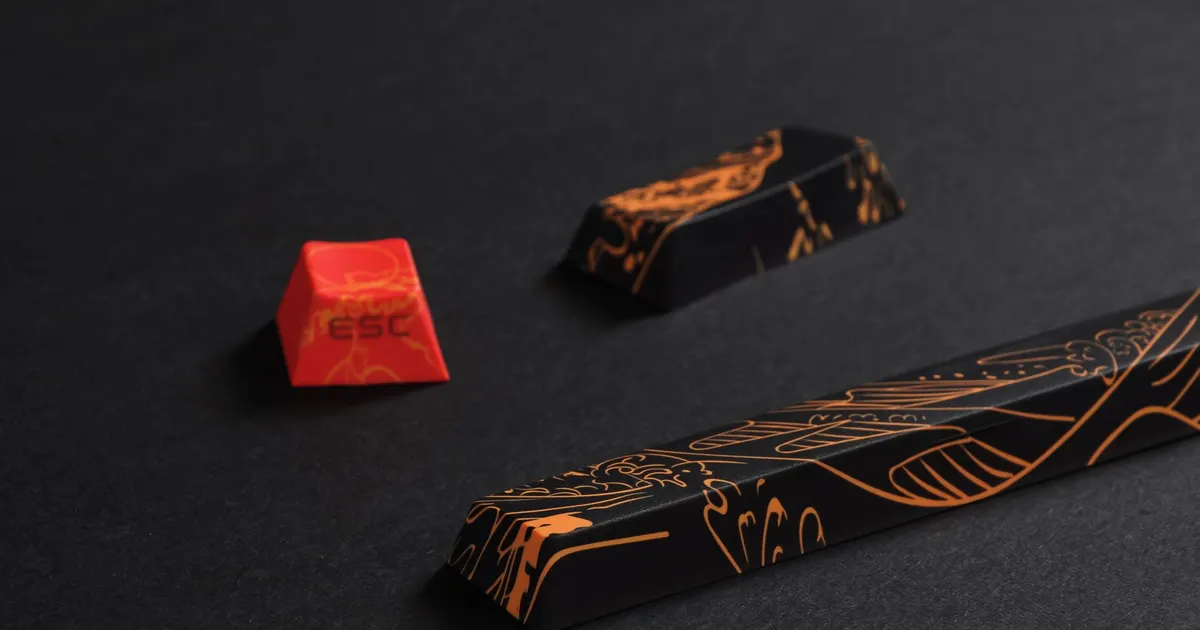
Metal keycaps are the smallest and most intricate parts in this niche. Each is about the size of a fingertip, and a set may carry a hundred of them. Done well, they are striking on a case that matches. Done poorly, they scratch, wobble on the switch or arrive in colours that do not agree.
For a shop they are a different job from a case. A case is a large part with a handful of features. A keycap is a tiny part with a tight fit, a visible finish and a small run quantity. This guide covers the points that decide the quote and the result.
What a machined keycap is
A machined keycap is a small block of metal, usually aluminium, brass, stainless steel or titanium, cut to the shape of a key. Most are milled from rectangular bar, and round caps for encoders and knobs are turned on a lathe. A typical one has:
- A top surface. Flat, dished or sculpted, and usually the most visible face.
- Sidewalls. The sides that the finger and the eye see.
- A hollow underside. Metal removed from below to cut weight and to make room for the stem.
- A stem socket. The cross-shaped hole that grips the switch.
- A legend. The letter or symbol, if there is one.
A set of caps for a full board has many different shapes. The sizes differ, the bottom row caps are not the same as the top row, and each needs a different program, though many share a fixture.
Materials and weight
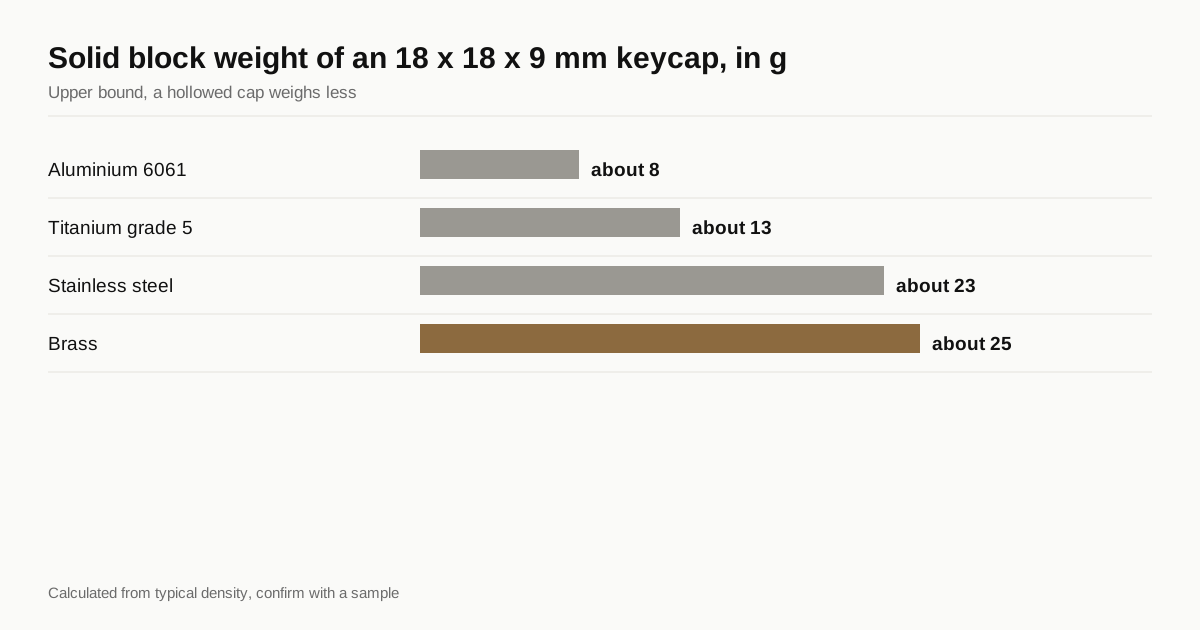
Metal keycaps are heavy compared with plastic ones. Here is the weight of a solid 18 mm square block 9 mm tall, calculated from density. Real caps are hollowed, so they weigh less.
| Material | Density | Solid block, 18 x 18 x 9 mm | Typical finish | Notes |
|---|---|---|---|---|
| Aluminium 6061 | 2.70 g/cm³ | about 8 g | Anodise, blast | Light, colourful, wears at the edges |
| Titanium grade 5 | 4.43 g/cm³ | about 13 g | Blast, colour oxide | Expensive and slow to cut |
| Stainless steel | 7.9 g/cm³ | about 23 g | Brushed, polished | Hard wearing, tough to machine |
| Brass | 8.5 g/cm³ | about 25 g | Lacquer, PVD or raw | Heavy, tarnishes if left raw |
The figures are only an upper bound. A hollowed cap carries a fraction of them, and the shop can weigh a sample. Weight matters because the switch spring has to lift the cap, and a heavy cap changes the feel of the key. It may bottom out harder and return more slowly. The same trade-offs apply to weights in the case, discussed in the brass weight guide, and a test set is the way to find out.
Aluminium is the sensible default. It is light, it anodises in colour and it cuts quickly. Brass looks warm and heavy but tarnishes unless it is lacquered or coated, and the coating choices are in PVD and Cerakote on keyboard parts.
The stem, where most trouble starts
The stem socket is the hardest feature on the cap. Most mechanical switches have a cross-shaped stem about 4 mm across, with arms about 1.3 mm wide. The cap’s socket must fit that cross snugly. Too loose and the cap wobbles. Too tight and it cannot be pulled off, or it cracks the switch stem.
A fit tolerance of a few hundredths of a millimetre is typical. That is difficult to get with a normal end mill, since a tool small enough to cut the arms leaves round internal corners and is fragile. Shops solve it in three ways:
- A very small cutter, such as a 1 mm tool, taking light passes. The corners end up rounded, so the stem is cut with a matching relief.
- Wire EDM, which cuts the cross shape cleanly without a tool, but adds a process and cost.
- A separate stem insert, made from plastic or metal and pressed or glued into the cap. The insert has the cross shape and the cap needs only a round hole.
The insert route is common because it makes the critical fit a separate, cheaper part. If the design uses a cut socket, ask the shop what tool and process it uses, and ask for a fit check on a real switch before the run.
Legends
Many metal caps carry a legend, and the method decides the look.
- Laser engraving. On anodised aluminium the laser burns the layer away and leaves bright metal inside the letter. It is fast and fine, and the same logic is explained in laser engraving.
- CNC engraving. A small cutter makes a true recess that can be filled with paint. Slow, but deep and tactile.
- Paint or ink fill. A recess is filled with a colour for contrast.
- None. Blank caps are common on artisan and novelty sets.
Legend size is limited by the cap. A character on a 1u cap is only a few millimetres tall, and fine strokes are tested at that scale.
Wear, noise and long keys
Metal caps meet metal in ways plastic caps do not, and a few habits at design stage prevent complaints.
- Edge wear. An anodised edge that a fingertip crosses thousands of times slowly polishes through. A small radius on the top edge wears better than a sharp one, and a harder anodise lasts longer.
- Cap to case contact. A metal cap that touches a metal bezel clicks and marks the case. Leave a visible gap of a millimetre or more around each cap and check it on a built sample.
- Long keys. A space bar and shift keys are heavy in metal and need stabilisers to match. A heavy long cap on a light stabiliser can rattle, so test the long keys first.
- Sound. A metal cap sounds different from a plastic one on the same switch, but how much depends on the whole build. Treat any claim as a reason to test, not as a result.
Test a handful of caps in the real board before ordering the set, since a heavy cap that feels wrong on the switch cannot be fixed afterwards.
Fixturing and cycle time
Small parts demand a different approach to workholding. A single cap is too small to hold on its own, so a shop uses a fixture plate with many positions, clamps a bar and cuts caps from it or uses a pallet of soft jaws.
- Many per setup. Twenty to sixty caps on one fixture is common. The setup time spreads across them.
- Cycle time per cap. A few minutes each, mostly in the finishing passes on the top and the stem.
- Handling. Caps are small and light, and they scratch each other. They need soft containers and gloves.
- Deburring. A burr on a keycap edge cuts a finger. Deburring is a hand or tumble operation and adds labour.
The fixturing ideas that apply to cases, such as locating on a flat face and keeping clamps off the visible faces, apply here too. See the fixturing guide.
Finishing small parts
Anodising a case is a rack job. Anodising a keycap is a different job, because the parts are tiny.
- Racking. Each cap needs a contact point for the current, and the contact leaves a mark. On a cap, that mark must go on the underside.
- Batch size. Hundreds of caps fit on a rack, so the finishing cost per cap is low once the batch is full, and high if it is not.
- Colour matching. Caps and the case anodised in different batches rarely match. If a cap set is meant to match a case, plan to anodise them together.
The batch effects are the same as for a full case and are explained in colour matching across a run.
What a small run costs
A machined cap is much more expensive than a moulded one. That is the nature of the process, and it is not a sign that a shop is overcharging. The cost has four parts:
- Setup and programming, spread across the run.
- Material, small per cap but with offcut waste.
- Machine time, several minutes each.
- Finishing and deburring, by batch.
Unlike a case, the cost per cap falls steeply with quantity, because setup and finishing are batch costs and a fixture holds many. A run of fifty costs far more per cap than a run of three hundred. The rule is the same as in keyboard case MOQ: the real minimum is the point where finishing and setup stop dominating.
Before you order
- Material and weight tested on a sample set
- Stem method agreed: cut socket or insert, with a fit check on a real switch
- Legend method and size agreed
- Finish and batch plan agreed, including racking mark position
- Quantity set at a point where the batch costs spread
- Soft packaging for delivery
If you are planning a small run of caps or a matching case, send the files through the RFQ form and we will match them with shops that machine small cosmetic parts.
Frequently asked questions
How heavy is a metal keycap?
A solid 18 mm square block of brass at 9 mm tall would weigh about 25 g, and aluminium about 8 g. A real cap is hollowed out, so the figure is lower, and the shop can give a weight from a sample. Weight changes the feel of the switch, so test before committing.
How does the stem of a metal keycap work?
The cross-shaped socket that fits a switch stem is very small, about 4 mm across with arms around 1.3 mm wide, and must fit within a few hundredths of a millimetre. It is cut with a very small tool, made by EDM or added as a separate insert.
How many keycaps do I need for a small run?
Tens to a few hundred are normal for a group buy of artisan or metal caps. A shop can fix many caps on one fixture, so setup spreads quickly, but cost per cap stays far above a moulded set.
Need a quote for your case?
Send the files. We match you with up to 3 shops that machine keyboard cases and reply within 24 business hours.
Get matched with a keyboard case shop